

How to Set Up Google Search Console?
Byte Blog • December 10, 2024
Proper setup ensures that Google collects and reports data about your site. Here are the steps you need to create your Google Search Console account!
Google Search Console (GSC) is a powerful tool that allows you to analyze your website's performance, enhance your SEO strategies, and monitor how your site appears in Google search results. Following the steps below, you can set up a GSC account, verify your website, and integrate it with your Shopify store to make the most of this tool.
Setting Up and Verifying Your Google Search Console Account
Google Search Console (GSC) is a free tool that helps you monitor your website's SEO performance, track traffic, and increase visibility. With GSC, you can deeply analyze your site’s status, identify issues, and optimize your content for better results. To fully utilize GSC, you first need to create an account and verify your website. Proper setup ensures that Google collects and reports accurate data about your site. Here are the steps to set up your Google Search Console account:
1. Log in to Your Google Account
Go to the Google Search Console homepage and sign in with your Google account. If you don’t have one, you can easily create a free account.
Your Google account serves as the foundation for accessing all Google services. For added security, enable two-factor authentication to protect your account from unauthorized access.
2. Click the "Get Started" Button
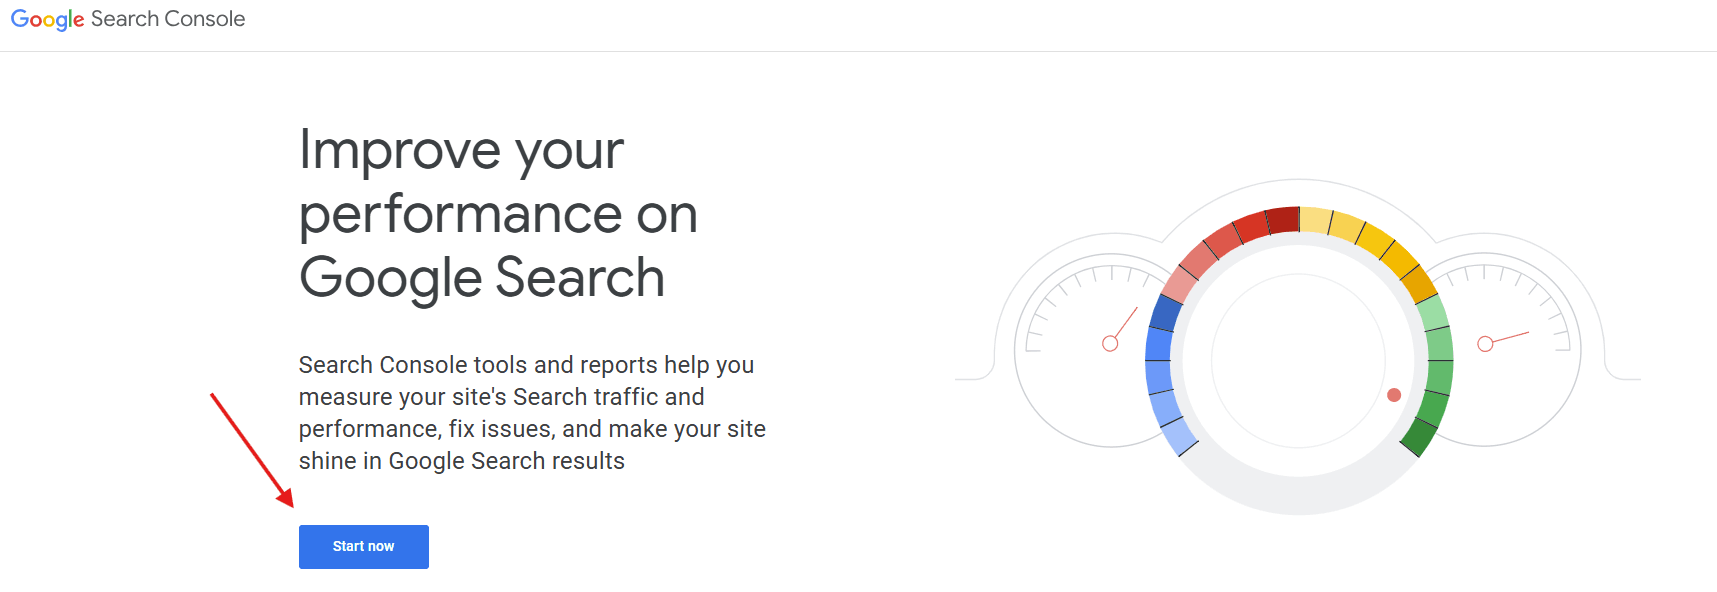
Once signed in, click the "Get Started" button on the homepage. This initiates the process of adding your website to the system for data collection.
GSC’s user-friendly interface ensures that even first-time users can navigate the setup process with ease.
3. Enter Your Website URL
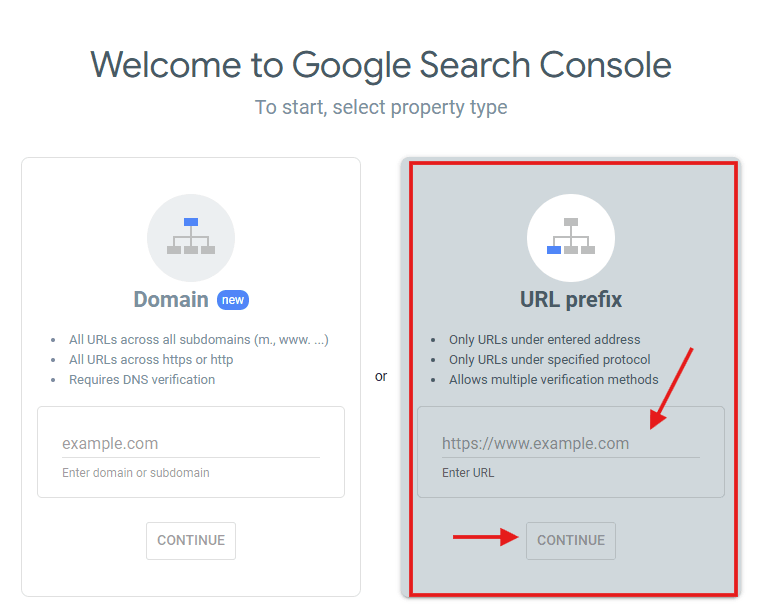
You will encounter two options for verification: "Domain" and "URL Prefix". The "URL Prefix" option is more flexible and widely recommended for most users.
Enter your website's full URL (e.g., https://www.example.com) correctly. This step is crucial to ensure accurate data collection and consistent analysis.
4. Choose a Verification Method
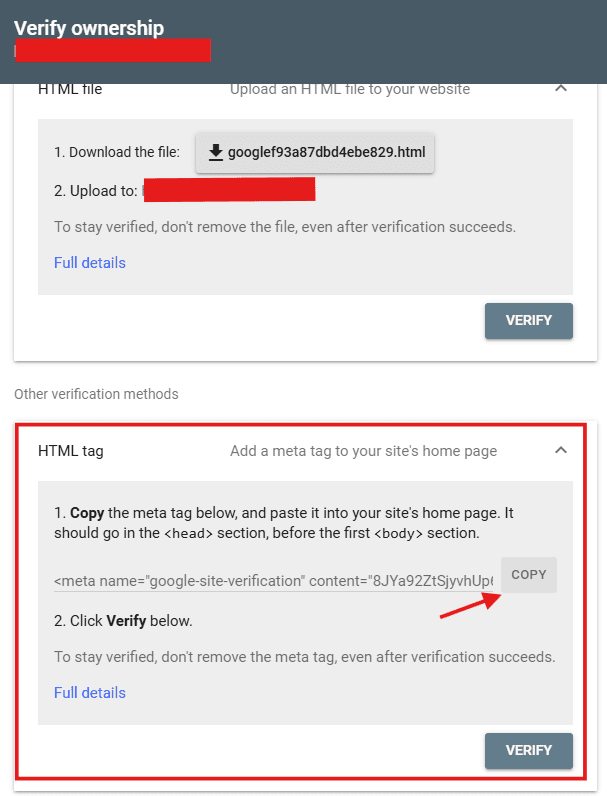
Google offers several methods to verify your site, including uploading an HTML file, using an HTML tag, Google Analytics integration, or Google Tag Manager.
For beginners, the HTML Tag method is the quickest and easiest. Select this option to simplify the process.
5. Obtain the Verification Code
After choosing your verification method, Google will provide a meta tag containing a verification code.
Carefully copy this code and keep it ready for use in the next step. The meta tag proves ownership of your website to Google.
6. Verify Your Website
Paste the copied meta tag into the <head> section of your website's source code. Depending on your platform (e.g., WordPress, Wix), you may need access to the HTML editor.
Save your changes and return to Google Search Console. Click the "Verify" button to complete the process. If successful, you can immediately start analyzing your site's performance data.
Linking Your Shopify Store with Google Search Console
If you run a Shopify store, integrating it with Google Search Console can significantly enhance your site’s visibility and performance on Google. GSC helps improve your store's visibility and provides valuable insights for optimizing your product pages for SEO.
1. Log in to the Shopify Admin Panel
Access your Shopify store’s admin panel. This is where you can manage SEO settings, customize themes, and make changes to your store's structure.
From here, you can adjust theme files, add verification codes, and optimize other store features.
2. Log in to Your Google Search Console Account
Sign in to your GSC account or create a new one if necessary. This step allows you to analyze your store’s performance and collect SEO data.
GSC not only shows your store's overall performance but also provides error reports and improvement suggestions.
3. Add Your Website
In GSC, click the option to add a "Web Property". This step registers your Shopify store’s URL with the system.
Please enter your store’s full URL (e.g., https://www.example-store.com) accurately. Incorrect URLs may result in failed verification.
4. Choose HTML Tag Verification
Select the HTML Tag method from the available verification options. Google will provide a meta tag containing the verification code. Copy this code for use in the next step.
5. Add the HTML Tag to Shopify
Follow these steps to add the tag:
Go to "Online Store" > "Themes" > "Actions" > "Edit Code" in your Shopify admin panel.
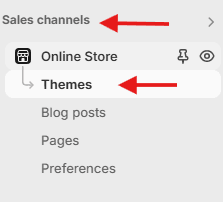
Open the "theme.liquid" file.
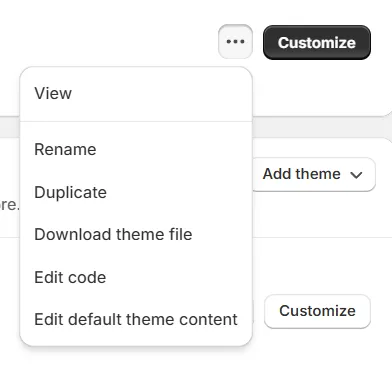
Paste the meta tag into the <head> section of the code. This ensures that Google can verify your store.

6. Save Changes and Verify
Save your changes in Shopify to activate the updates.
Return to Google Search Console and click the "Verify" button. Once verified, you can begin analyzing and optimizing your store's performance.
Data-Driven SEO Management with Google Search Console
Google Search Console is an indispensable tool for improving your website’s visibility in search engines. Following the steps above, you can easily create your GSC account and integrate it with your Shopify store. Proper configuration enables you to monitor your site’s performance, identify issues, and refine your SEO strategy effectively.
Regularly reviewing and utilizing the data provided by GSC ensures continuous improvement in your website’s search rankings and traffic. This integration offers Shopify users a convenient way to boost visibility and drive organic traffic. A well-optimized website, powered by GSC insights, is key to long-term success in e-commerce.