

How to Unsubscribe from Shopify in 4 Steps

Byte Blog • May 26, 2024
In this post, we'll then guide you through the steps of pausing, canceling, and deleting your Shopify account.
Are you considering unsubscribing from Shopify? Whatever the reason, you'll need to know how to cancel your Shopify subscription. The good news is that canceling our Shopify account is a simple process! You can easily pause your subscription and/or cancel your Shopify membership. With as little downtime and disruption as possible, you may even backup your store and move it to a different location.
In this post, we'll then guide you through the steps of pausing, canceling, and deleting your Shopify account. Finally, a few Frequently Asked Questions (FAQs) will be discussed. Now let's get started!
What Do You Need to Do to Pause Your Shopify Subscription?
When you cancel Shopify, you completely delete your store from the platform. But another option is to pause your subscription.
Pause and Build mode is ideal for when you want to make alterations in your store such as adding new products. With this plan, your customers can access your store, but they can't buy anything. Choosing this mode, you will be charged a discounted subscription fee of $9.
To suspend your Shopify subscription, you can follow these steps:
1. Log in to Shopify: Log in to your Shopify account using your internet browser.
2. Access the Admin Panel: Click “Settings” in the menu on the left to access the Shopify admin panel.
3. Enter the Plans and Additions Section: On the Settings page, go to the “Account” tab, and then find the “Plans and permissions” option.
4. Suspend Subscription: Under “Store status”, find “Pause and build”. Here you can suspend your subscription.
After these steps, you will be asked to accept the terms. Select Pause and move to Create to continue.
Finally, you can click the Confirm Changes button to complete the process.
After you follow these steps, your Shopify subscription and the subscription costs will be suspended. When you want to reactivate your account, you can reactivate your subscription by following the same steps.
How to Cancel Your Shopify Membership in Four Easy Steps
Remember that even if you change your mind later, you won't be able to reopen your store after canceling Shopify. Therefore, we advise holding off on renewing your subscription until you are positive you are finished utilizing the Shopify platform.
Step 1: Get Your Account Ready
If you're thinking about canceling your Shopify subscription, there are a few things you should do to prepare your account. Firstly, make sure that you've taken care of any unpaid balances or charges you owe. If you cancel your subscription during a billing cycle, Shopify will send you a final invoice you must clear.
In addition, it's important to back up and export your site data. Shopify stores your data for two years after you cancel, but if you want to access it after closing your store, you'll need to purchase a new plan. To avoid this, you should export your store data before canceling Shopify.
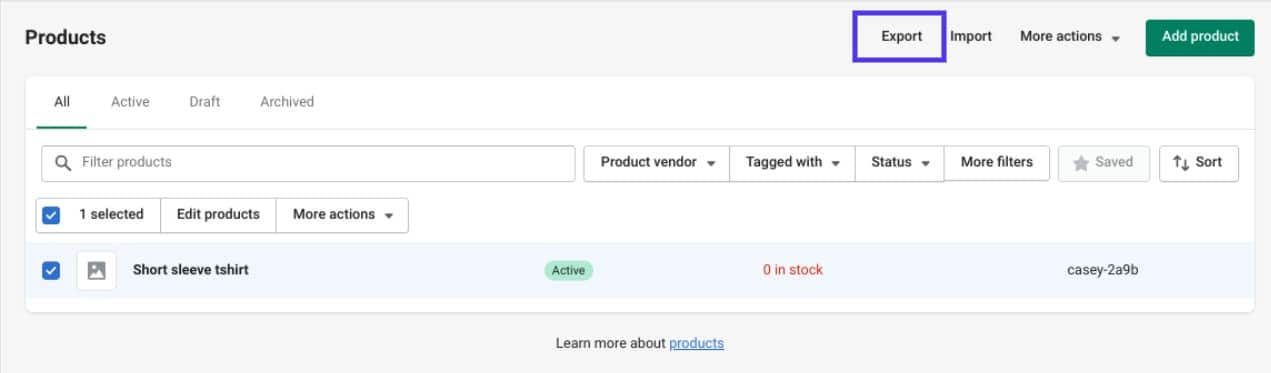
Exporting your Shopify product data in CSV format is simple. This file will include all the important information about your products such as titles, slugs, tags, etc. To export your product data, log in to your Shopify account and select Products > All Products.
Don't risk losing your valuable data - take the time to export it before canceling your subscription. By doing so, you'll ensure that you have a backup of your data and can access it whenever you need it.
After selecting "All products" and your preferred file format in the pop-up, simply click on "Export products" to initiate the process.
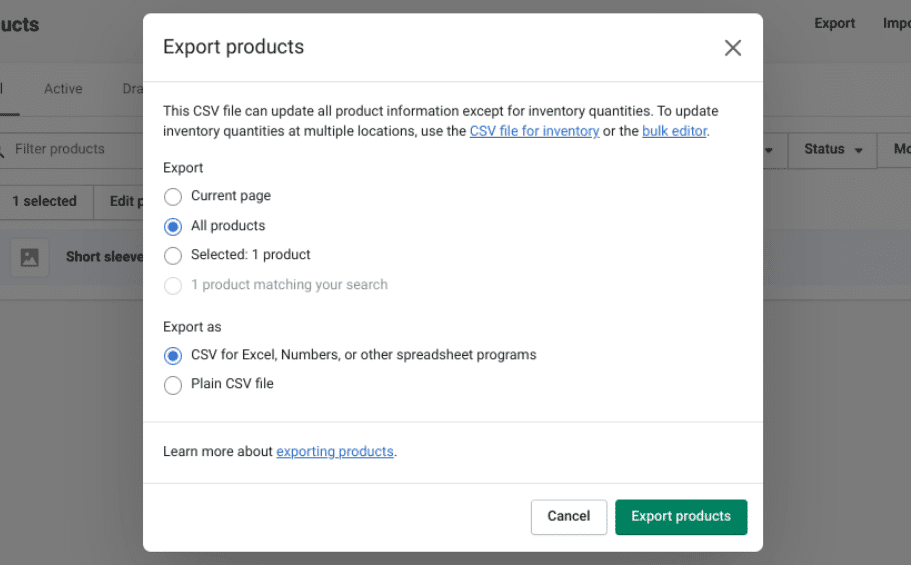
Once done, your CSV file will be sent to the email address linked to your Shopify account.
Step 2: Uninstall Applications
To ensure that you don't get charged for any app that you no longer use, it is essential to uninstall them. Some apps might continue to charge you even after you close your store, which is why it's vital to disconnect and remove any third-party services or apps from the Shopify App Store.
To uninstall the apps, you can go to Apps in your Shopify account dashboard. This section allows you to view all the apps that are currently installed on your site.
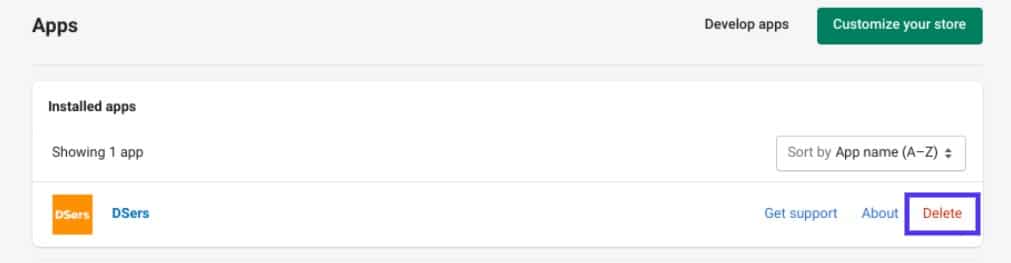
It is important to review each app and select Delete. It is recommended to double-check all apps that have recurring charges and remove them if they are no longer required.
Step 3: Transfer Your Custom Domain
Shopify does not renew your custom domain name automatically after you cancel your account. Therefore, if you have a custom domain name, it’s recommended that you transfer it to another registrar to avoid losing it.
In your Shopify admin panel, you can manage several Domain Name System (DNS) settings including TXT, MX, and CNAME records. It's important to note that you can only transfer a domain from Shopify 60 days after purchasing it.
The process for transferring your domain will depend on how you obtained it. If you connect a third-party domain to Shopify, you can remove the domain from the Shopify domain list by selecting "Remove" next to it under "Settings" > "Domains". Then you can update the DNS settings with your new hosting provider.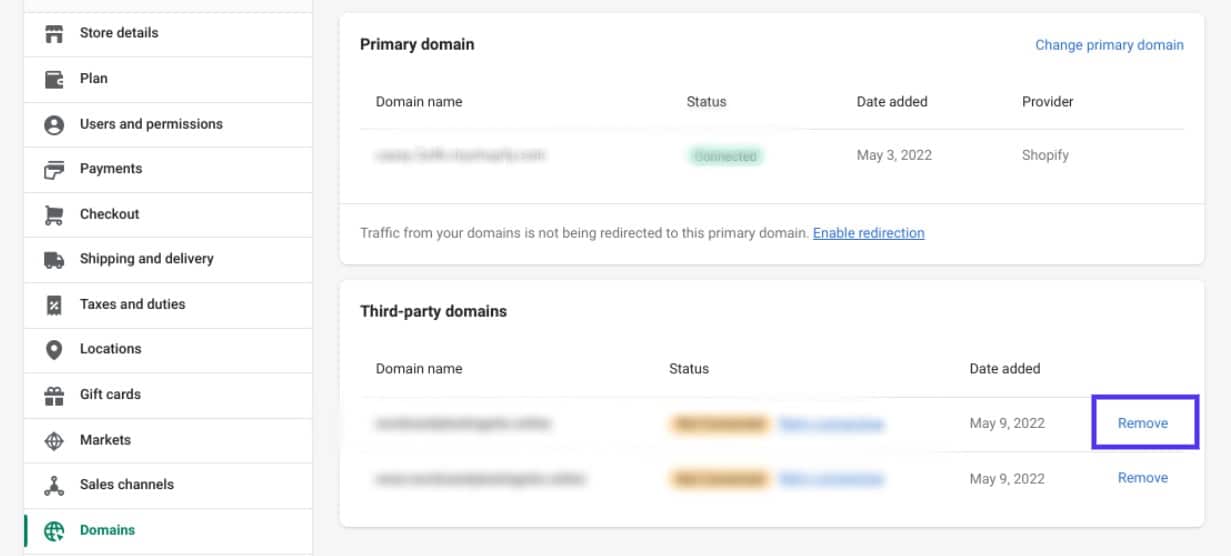
On the other hand, if you purchased your domain through Shopify, you’ll need to transfer its management to another hosting platform or registrar.
Step 4: Close Your Store via Shopify Settings
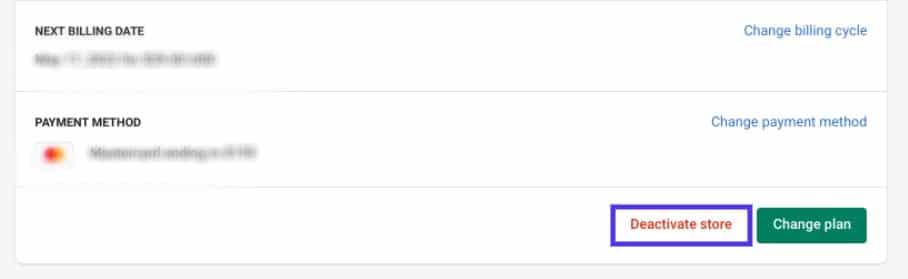
To close your store on Shopify, you need to access your account and go to the Plan section under Settings. At the bottom of the screen, you will find a Deactivate store button. Click on it to proceed with the closure of your store:
You will be prompted to provide a reason for deactivating your Shopify account. Depending on the reason you select, you may be asked to answer additional questions. Once you have chosen a reason, click on the Continue button. After that, you will need to re-enter your password:
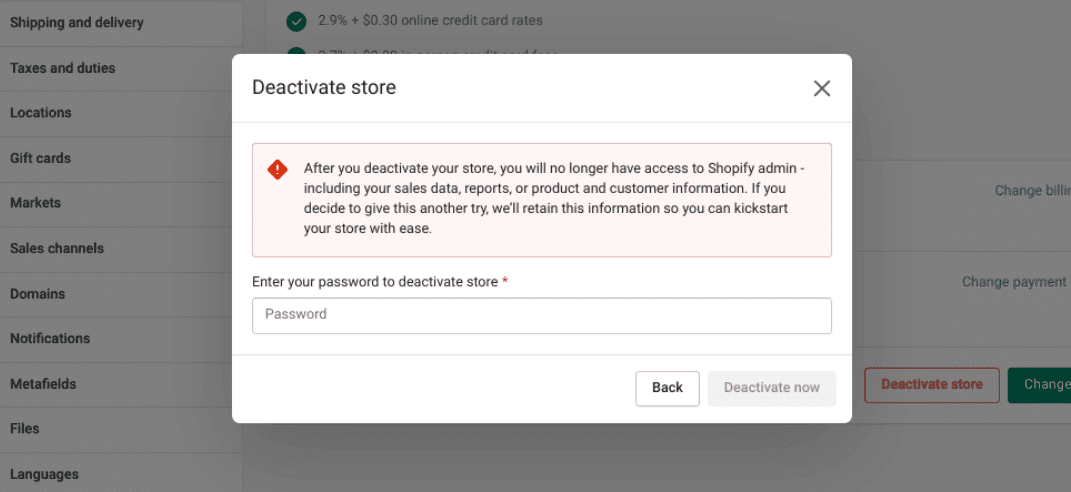
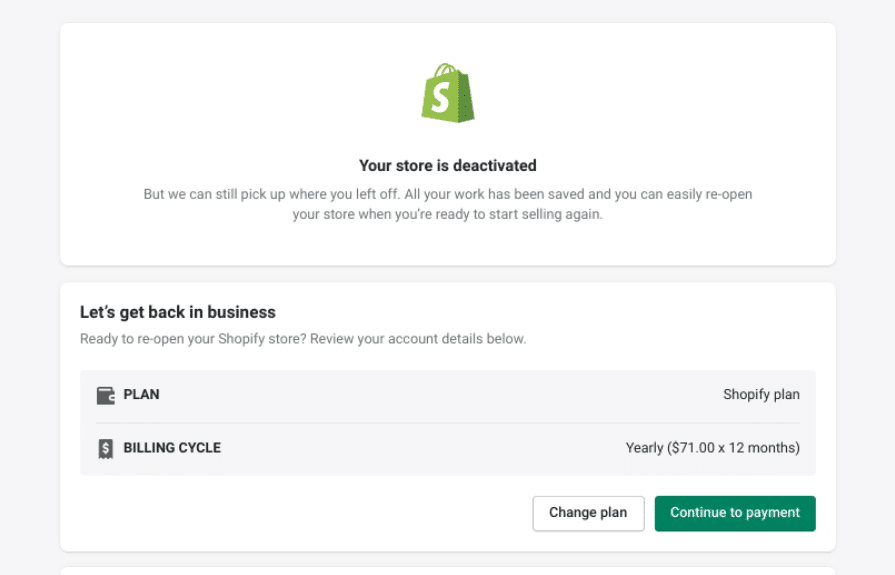
After entering your password, please proceed to select the "Deactivate now" option. If the deactivation process is successful, you will be redirected to a page that confirms your store has been deactivated.
You can access details about your previous payments by clicking on the "View your past bills" drop-down menu. Additionally, you have the option to download these records for your reference.
Frequently Asked Questions for Shopify Subscription Cancellation
You should now have a clear understanding of how to cancel your Shopify subscription. But, to tie up any loose ends, let's address some frequently asked questions.
Is it possible to receive a refund for a Shopify subscription that I have already paid for?
Shopify offers a 14-day trial that does not require credit card information. You may cancel this trial at any time. However, customers who close their stores are typically not refunded by Shopify.
Nevertheless, Shopify may be willing to make exceptions to their no-refund policy in certain special circumstances. If you want to explore your options and potentially obtain a refund, your best course of action would be to contact support and make your case.
What happens when a Shopify subscription is canceled?
When you cancel your Shopify subscription, you lose access to your store and admin panel. To regain access, you must choose a new plan and enter your credit card information. Additionally, you cannot create a new Shopify store using the same domain name that was previously used.
Cancel Your Shopify Subscription Guide: Easily Complete in 4 Step
When it comes to canceling your Shopify subscription, making that decision can be daunting. But fret not, we're here to guide you through it step by step! We've outlined the process of canceling your subscription in four easy steps. Get prepared, follow the steps, and carefully consider your decision. Our support team is always here to answer any questions you may have!